
 Business License
Shank Button vs Flat Button: Matching Construction to Garment Weight
The shank button vs flat button decision looks like a styling question and behaves like a structural one, because the two parts handle a thick panel in completely different ways. A shank button carries a built-in post that lifts the face clear of the fabric, while a flat button sits hard against the surface and relies on the thread to create the clearance it needs. Choosing the wrong one on a heavy panel produces a closure that either will not fasten or tears the thread out within a season.
This guide sets out the structural difference, explains how button shank height is measured and what it has to clear, compares the two parts against garment weight, and closes with the tolerances worth writing on a drawing.
1. Shank Button vs Flat Button: The Structural Difference
The difference between the two forms sits entirely underneath the face, where the buyer rarely looks. A shank button has a moulded or cast post behind the disc, so the disc stands at a fixed distance from the fabric once the post is sewn down. A flat button, also called a sew through button, has no post at all, and the sewing thread forms a soft shank when the maker builds one deliberately.
That single difference changes three things at once. It sets how far the buttonhole has to travel to reach the face, how much the disc can tilt under load, and how much the fabric compresses when the closure is fastened. A moulded post is rigid and keeps its height through the life of the garment, while a thread shank compresses slightly under tension and grows softer with every wash.
| Feature | Shank button | Flat button |
|---|---|---|
| Clearance source | Moulded or cast post | Thread shank built at the machine |
| Height consistency | Fixed by the mould | Varies with the operator |
| Panel thickness | Suits heavy and layered fabric | Suits light to medium fabric |
| Self-fastening | Can carry a snap mechanism | Requires a buttonhole |
| Repair | Re-sewn like any button | Re-sewn like any button |
One point of confusion is worth clearing early, because it costs buyers time on a specification. A metal shank button can and often does carry a snap mechanism inside, which makes it a self-fastening closure rather than a sewn one. A plastic shank with a plain bore stays a sewn part, so the two should never be quoted from the same line on a purchase order.
2. Button Shank Height and What It Clears
Button shank height is the distance from the underside of the disc to the point where the post meets the fabric, and it is the figure that decides whether the closure works at all. If the height is less than the thickness of the assembled front, the button sits compressed against the fabric and the buttonhole cannot pass underneath. If the height is greater than the fabric needs, the disc floats and tips sideways under the slightest sideways pull.
| Garment | Panel thickness | Target shank height | Result if too low |
|---|---|---|---|
| Light shirt | 1 - 2 mm | 2 - 3 mm | Disc pressed flat, hole strained |
| Dress shirt placket | 2 - 3 mm | 3 - 4 mm | Difficulty fastening by hand |
| Blazer front | 3 - 5 mm | 4 - 6 mm | Fabric bunched at the buttonhole |
| Overcoat | 5 - 8 mm | 6 - 9 mm | Front will not close cleanly |
| Fur and padded trim | 8 - 14 mm | 10 - 15 mm | Closure unusable |
The rule to carry into a specification is that the shank height should exceed the panel thickness by about 1 mm to 2 mm. That margin leaves room for the buttonhole to travel and for the fabric to compress slightly under the closure without pressing the disc into the surface. A padded coat front of 10 mm thickness therefore needs a shank of 11 mm to 12 mm rather than the 8 mm that looks generous on a drawing.
Difei Button (Guangzhou) Co Ltd measures the assembled front thickness during sampling rather than quoting a shank height from a standard range, because the same garment can carry two different fronts across a size run.
3. Sew Through Button Construction: Two and Four Hole Types
A sew through button carries its holes either in a recessed centre or in a raised boss, and the layout decides what kind of thread shank can be built under it. A four hole flat disc with a recessed centre lets the maker lay a bar across the underside to form a shank. A two hole disc gives less room and usually ends up flat against the fabric, which is why it suits light garments.
The hole position also affects wear. Holes that sit close to the rim leave little material between the bore and the edge, so the disc can crack at the rim under a hard pull. Holes that sit in a raised boss move the thread away from the rim and lengthen the life of both the disc and the thread, at the cost of a slightly taller profile.
Choosing between them comes down to the same clearance question that governs a shank button. Where a garment needs a shank but the design calls for a sew through face, a four hole disc with a deliberately built thread shank is the usual answer. The height is then set by the maker rather than by a mould, which gives flexibility at the cost of consistency across a production run.
4. Button Shank Height by Garment Weight
Button shank height scales with garment weight, and the relationship is close to linear once the fabric passes about 300 gsm. A light shirting panel of 110 gsm needs just 2 mm to 3 mm of clearance, while a heavy overcoating of 700 gsm needs 6 mm to 9 mm. The figures move in small steps because the buttonhole also has to grow with the panel, and an oversized hole on a light fabric damages the front.
| Fabric weight | Garment type | Shank height | Button size |
|---|---|---|---|
| 100 - 160 gsm | Shirting, blouses | 2 - 3 mm | 16L - 20L |
| 180 - 280 gsm | Trousers, light jackets | 3 - 4 mm | 20L - 24L |
| 280 - 400 gsm | Blazers, structured jackets | 4 - 6 mm | 24L - 28L |
| 450 - 700 gsm | Overcoats, heavy wool | 6 - 9 mm | 28L - 34L |
| Coated or padded | Technical outerwear | 10 - 15 mm | 24L - 32L |
The last row is where the specification most often goes wrong, because a padded or coated panel behaves differently from a woven one of the same nominal weight. The padding compresses under pressure and then recovers, so the effective thickness changes during the fastening action. A closure specified from the static measurement will feel loose when the panel is compressed and tight when it recovers.
Sampling on the real panel settles that question far faster than a calculation. Difei Button builds a trial piece at the intended shank height and has the maker fasten it by hand, which exposes a panel that compresses more than the measurement suggests.
5. Sew Through Button Limits on Heavy Panels
A sew through button reaches its limit on a heavy panel, and the limit arrives suddenly rather than gradually. Below about 400 gsm the thread shank can be built long enough to work, and above that the shank grows tall enough to flex sideways under load. A tall thread shank also concentrates stress at the holes, so the thread cuts into the disc rather than pulling against the fabric.
Three specific failures mark a sew through closure that has been pushed past its range. The disc tips to one side after a few weeks of wear, because a long thread shank has no lateral stiffness. The thread wears through at the hole edge, because the shank angles across the bore under every fastening. The fabric crushes around the stitch and leaves a permanent mark, because the closure compresses the panel more than it can recover.
A coat maker who fitted a 4 mm shank by hand onto a 9 mm wool front met all three symptoms within one season. Moving to a moulded shank of 6 mm resolved all of them at once, because the rigid post held the disc at a fixed height instead of relying on a soft column of thread to do the same job.
6. Shank Button vs Flat Button: Stitch Load and Buttonhole Wear
Stitch load and buttonhole wear separate the two forms more clearly than any dimensional table, because they describe what happens over thousands of fastening cycles. A shank button transfers the pull from the buttonhole straight into a rigid post, so the thread carries almost no bending load and the disc stays parallel to the front. A flat button transfers the same pull into the thread column, which bends and recovers with every fastening.
| Behaviour | Shank button | Flat button |
|---|---|---|
| Load path | Through a rigid post | Through a flexible thread column |
| Disc angle under pull | Stays parallel to the front | Tilts with the direction of pull |
| Thread wear | Low, thread barely flexes | Higher, thread flexes every cycle |
| Buttonhole wear | Concentrated on one face | Spread across the opening |
| Repair frequency | Lower on heavy garments | Lower on light garments |
Buttonhole wear follows the opposite pattern from what most buyers expect. A rigid post presses against one face of the buttonhole and can wear a polished track into a stiff leather or coated panel, while a thread shank distributes the contact and damages the fabric less. On an unlined leather jacket the softer thread shank protects the panel, and on a wool coat the rigid post protects the thread.
The practical answer on a mixed garment is to fit each position with the part that suits the panel behind it, rather than applying one form across a whole style. Working through the shank button vs flat button question position by position costs nothing and removes the compromise that a single choice forces on a mixed garment. Difei Button quotes the two forms separately on a mixed order, so the cost difference between them stays visible during the design stage.
7. Button Shank Height Tolerances and Setting
Button shank height needs a tolerance band on the drawing, because a moulded post varies across a production run just like any other dimension. A band of plus or minus 0.3 mm on a 5 mm shank is realistic for a moulded POM part and tight for a cast metal one. Writing a nominal figure without limits invites an argument at goods-in that neither side can settle.
| Dimension | Typical band | Why it is bounded |
|---|---|---|
| Shank height | Plus or minus 0.3 mm | Sets whether the buttonhole passes |
| Shank diameter | Plus or minus 0.2 mm | Sets the sewing window |
| Disc diameter | Plus or minus 0.2 mm | Sets the visual proportion |
| Hole diameter | Plus or minus 0.1 mm | Sets the thread fit |
| Base flatness | 0.1 mm maximum gap | Sets how the disc seats on fabric |
Base flatness is the dimension that gets omitted most often and matters most on a moulded part. A base that is not flat rocks against the fabric, so the shank height measured on a bench does not describe the clearance the wearer experiences. Measuring the gap between the base and a flat plate with a feeler gauge is a quick check that catches the fault before it reaches a shipment.
Difei Button records the shank height, the base flatness and the hole diameter on the same drawing, and holds a sealed first article so a repeat order has a physical reference to measure against rather than a description to interpret.
8. Sew Through Button Attachment Methods Compared
Attachment method decides how well a sew through button performs in service, and three methods cover almost every case. A bar stitch passes thread across the underside to create a shank. A cross stitch works four holes in an X pattern and holds the disc flat. A shank with a stay button places a smaller disc behind the placket so the pull never reaches the front fabric.
| Method | Shank formed | Suits | Watch for |
|---|---|---|---|
| Bar stitch | Yes, 1 - 2 mm | Light garments needing clearance | Shank compresses with wear |
| Cross stitch | No, flat | Shirts, visible plackets | Disc can tilt under pull |
| Shank plus stay | Yes, fixed height | Coat fronts, heavy panels | Extra handling time |
| Machine-set tack | No, flat | High-volume light garments | Little repair tolerance |
The stay button is the method that pays for itself on a heavy garment. It moves the load from a single layer of wool into two layers and a separate disc, which lengthens the life of the front panel considerably. The extra cost is a second part and a few seconds at the machine, and the benefit is a placket that does not develop a torn buttonhole in the first winter.
Machine-set tacks suit high volumes of light garments, where the closure is rarely opened and the repair cost is lower than the labour cost of a hand-finished stitch. That trade is worth stating explicitly during sampling, because it removes a closure from the repair path rather than improving its strength.
9. Frequently Asked Questions
9.1 When should I use a shank button instead of a flat button?
Use a shank button whenever the assembled front is thick enough that a flat disc would press against the fabric, which in practice means panels above about 4 mm. The built-in post holds the face at a fixed height, so the buttonhole can travel underneath and the fabric does not bunch around the closure. On light shirting a flat button remains the better choice, since a moulded post would stand proud and look out of proportion. The decision follows the panel rather than the price, because the two forms sit within a few percent of each other on cost.
9.2 How is button shank height measured?
It is measured from the underside of the disc to the point where the post meets the fabric, and it should exceed the panel thickness by about 1 mm to 2 mm. A padded coat front of 10 mm therefore needs a shank of 11 mm to 12 mm rather than the 8 mm that looks generous on a drawing. Measuring the assembled front during sampling is more reliable than calculating from a nominal fabric weight. A padded panel compresses under pressure and recovers, so the clearance changes during the fastening action and a static measurement can mislead.
9.3 Can a sew through button work on a coat front?
It can work up to about 400 gsm, where a thread shank can still be built long enough without flexing sideways under load. Above that weight the shank grows tall enough to tilt, the thread wears at the hole edge and the fabric crushes around the stitch. A coat maker who fitted a hand-built 4 mm shank onto a 9 mm wool front met all three faults within one season. Moving to a moulded shank of 6 mm resolved all of them at once, because a rigid post holds the face at a fixed height.
9.4 What tolerances belong on a shank button drawing?
The drawing needs a band on the shank height, the shank diameter, the disc diameter and the hole diameter, and it needs a base flatness limit that is easy to omit. A band of plus or minus 0.3 mm on the shank height is realistic for a moulded part, and a flatness limit of 0.1 mm keeps the base from rocking against the fabric. Measuring the gap with a feeler gauge catches that fault quickly. A base that rocks against the fabric also makes a bench measurement of shank height meaningless, since the clearance the wearer feels is not the clearance a gauge reads on a flat plate.
Recently Posted
-
Buttons for Bedding, Pillow Covers and Home Textiles
September 28, 2026A home textile button lives a harder life than a garment closure, because it is unfastened to wash and refastened when the item go Read More
 -
Specifying Button Tolerances on a Purchase Order
September 28, 2026Two shipments can both match the drawing and still fail to work together, because a nominal figure says nothing about where inside Read More
 -
Ordering Custom Badges: Tooling, Backing and Approval Steps
September 28, 2026A custom metal badge order fails for one of three reasons, and none of them is the price of the metal. The artwork is approved bef Read More
 -
Two-Hole and Four-Hole Buttons: The Overlooked Workhorses of Garment Trims
September 28, 2026A four hole button is the most common closure in the world and the least discussed, because it does a quiet job and never becomes Read More

Contact Us
Recommended Products
-
 Clothing Accessories Lead Free Brass Metal Ring Prong Snap Button With 4 Parts for Infant Baby Clothes Baby BibsUS$ 0.01 - 0.03MOQ: 5000 Sets
 -
Brass Metal Stainless Steel Material Ring Prong Snap Button With 4 Parts Lead Free & Nickel Free for Infant Baby Clothes Baby Bibs Baby SuitsUS$ 0.01 - 0.03MOQ: 5000 Sets
-
Metal Grommets Eyelets Gold Eyelet for Bag Shoes and Garment AccessoriesUS$ 0.01 - 0.03MOQ: 5000 Sets
-
Cheap Price Custom Jeans Button Metal Custom Logo Metal Button for JeansUS$ 0.01 - 0.03MOQ: 5000 Sets
-
Factory Wholesale Hat Bag Clothing Press Snap Button Spring Snap Button Metal Snap ButtonsUS$ 0.03 - 0.06MOQ: 5000 Sets
-
Wholesale Plastic Round Coloured Snaps Button Press Fasteners for Baby Bibs/ Baby GarmentsUS$ 0.01 - 0.03MOQ: 50000 Sets
-
Custom EngravedCopper I Brass Metal Jeans Button Denim Clothes Jacket for Jeans DenimUS$ 0.01 - 0.03MOQ: 5000 Sets
-
17mm Open Hole Shank Button With Aluminum Nail With Logo for Jeans Jacket PantsUS$ 0.01 - 0.03MOQ: 5000 Sets
-
Eco-friendly Custom Size Plastic Snaps Plastic Snap Button for Baby Clothes, Baby BibsUS$ 0.01 - 0.03MOQ: 50000 Sets
-
12mm 15mm 17mm 20mm Four Parts Metal Brass Fastener Press Snap Button for Clothes JacketUS$ 0.03 - 0.06MOQ: 5000 Sets
-
Custom Logo Personalized High Quality Metal Press Snap Fastener Snap Buttons for Clothing Garments JacketUS$ 0.03 - 0.06MOQ: 5000 Sets
-
Custom Printing Round Press Spring Four Part Snap Button for Clothing Leather 405#17mmUS$ 0.03 - 0.06MOQ: 5000 Sets
-
OEM Garment Accessories Custom Baby Snap Button Press Metal Prong Pearl Ring Snap ButtonUS$ 0.01 - 0.03MOQ: 5000 Sets
-
Factory Stock Buttons Stainless Steel or Brass Material Colors Pearl Snap Button Prong Pearl Snap Button for Shirts ClothingUS$ 0.01 - 0.03MOQ: 5000 Sets
-
Resin Snap Buttons 9mm POM Heavy Duty Closure Parts for Baby Bibs and Textile Handmade Sewing ProductionNegotiableMOQ: 50000 Sets
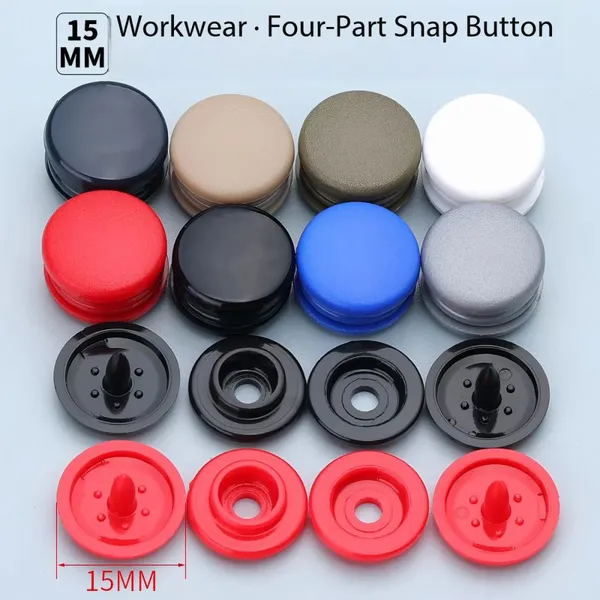
-
13.8mm x 7.5mm Plastic Grommet Kit for Apparel and Garment Lacing, Lightweight and FlexibleNegotiableMOQ: 5000 Sets
-
Clear Plastic Eyelet and Washer Set Two‑piece Fastener for Tote Bags Canvas and Fabric Hole Reinforcement ApplicationsNegotiableMOQ: 5000 Sets
-
13.8mm x 7.5mm Clear Plastic Eyelet and Washer Set Durable Two‑part Hardware for Fabric Reinforcement and Bag Making ApplicationsNegotiableMOQ: 5000 Sets
-
Two‑Piece Plastic Grommet and Washer Set 13.8mm x 7.5mm Clear Hardware for Banner Craft Works and Light‑weight Textile ProductionNegotiableMOQ: 5000 Sets
-
Clear Plastic Eyelet and Washer Set 13.8mm x 7.5mm for Tarps, Banners, and Awning Fabric ReinforcementNegotiableMOQ: 5000 Sets