
 Business License
Blog Categories
Pin vs Sew-On Badges: Choosing the Attachment Method
Two badges can be identical in size, shape and embroidery and still suit different garments, because what separates them is the way they are fixed. The question of a pin badge vs sew on badge is decided by how the garment is used, not by how the badge looks in a sample bag.
This guide sets out the full range of badge backing options, compares the two main methods on load, wear, laundering and removal, and gives a decision path from the garment type and the cost target. It also covers the faults that show up after a season of wear.
1. What a Pin Badge vs Sew On Badge Decision Actually Turns On
The choice turns on four things: whether the badge has to be removable, how much load the panel sees, whether the garment is laundered by the wearer or by a service, and whether the panel can take a needle. A pin badge answers the first question and a sew on badge answers the rest.
A pinned badge leaves no hole in the fabric beyond the pin itself, so it can be moved, swapped or collected. That is why the method dominates on blazers, caps, uniforms worn by a changing staff and any application where a badge is issued rather than built in.
A sewn badge becomes part of the garment. It survives industrial laundering, it does not work loose in a pocket, and it cannot be mislaid by the wearer. The trade is that the panel carries a line of needle holes, which shows if the badge is ever removed.
2. Badge Attachment Method: The Full Set of Options
There are more badge attachment method options than the two names suggest, and several sit between the pinned and the sewn. Iron on uses a heat activated adhesive, hook and loop uses a matched pair of tapes, and a bar and safety pin combines a stiff bar with a captive pin for a heavier emblem. The pin badge vs sew on badge split is therefore a starting point rather than a full list.
Each method has a panel it suits and a failure mode it avoids. Iron on avoids needle holes but fails at the adhesive if the panel is coated or the wash is hot. Hook and loop is removable and repositionable but adds thickness. A magnetic fixing avoids piercing the panel altogether, yet it is unsuitable anywhere a magnet could disturb a cardiac device.
| Method | Removable | Panel damage | Suits |
|---|---|---|---|
| Pin, butterfly clutch | Yes | Two small holes | Blazer, cap, uniform |
| Pin, rubber clutch | Yes | Two small holes | Heavier emblem |
| Bar and safety pin | Yes | Two holes, wider spread | Large or long badge |
| Sew on | No | Needle line | Workwear, sportswear |
| Iron on | No | None, but adhesive residue | Flat woven panel |
| Hook and loop | Yes | Stitched tape remains | Display and event wear |
| Magnetic | Yes | None | Fine fabric, no piercing |
3. Badge Backing Options for Pinned Badges
The badge backing options for a pinned part matter as much as the pin itself, because the backing sets how the emblem sits against the panel. A flat stamped back sits closest, a raised back clears a thick weave, and a moulded back can carry a recessed channel for the pin assembly. Difei stocks all three profiles so the fit can be checked against a real panel before tooling.
Clutch type is the second half of the choice. A butterfly clutch is the commonest and holds with a sprung metal flange, while a rubber or PVC clutch grips by friction and gives a softer release. A locking clutch needs a tool or a magnet to release, which suits a badge that should not be taken off by the wearer.
Where the badge is heavy, the pin is often doubled or the backing is fitted with a twin post. A single post carrying more than about 15 g will rotate the badge on the panel, and a badge that swings out of line on a blazer lapel looks careless.
| Backing | Clutch | Badge weight | Release |
|---|---|---|---|
| Flat stamped | Butterfly | Up to 15 g | Sprung, standard |
| Raised | Butterfly | Up to 20 g | Sprung, standard |
| Moulded with channel | Rubber or PVC | Up to 25 g | Friction, softer |
| Twin post | Two clutches | 25 to 60 g | Tool release |
4. Sew On Badges: Stitching, Badge Backing Options and Panel Choice
A sew on badge is fixed with a running stitch around the perimeter, which distributes the load along the whole edge rather than at two points. That is what makes the method the durable answer for workwear, where a badge may stay on a garment through fifty or more industrial washes.
The stitch itself needs room. A border of 2 mm to 4 mm between the embroidery edge and the stitch line keeps the needle clear of the thread, and a felt or twill backing gives the needle a consistent material to pass through. Where the badge is stiff, a fusible interfacing behind the panel stops the weave from distorting along the stitch line.
Panel choice matters as much as stitch choice. A tight woven poly cotton holds a stitched badge well, while a coated or laminated panel resists the needle and leaves oversized holes. On a coated panel the badge is usually applied with adhesive backed by a stitched frame, which combines the two methods.
| Panel | Stitch | Backing | Note |
|---|---|---|---|
| Poly cotton workwear | Running, 4 mm border | Twill | Highest durability |
| Knitted polo | Running, low tension | Fusible interfacing | Avoid distortion |
| Coated jacket | Adhesive with stitched frame | Adhesive patch | Needle resists coating |
| Wool blazer | Hand or fine machine | None | Keep the hole line fine |
5. Load, Wear and Badge Attachment Method
The badge attachment method decides where the load goes. A pin concentrates the whole load at two points of a thin wire, so the fabric around those points takes several times the stress of the badge weight. A stitch spreads the same load along an edge of 80 mm or more, which lowers the stress per unit of fabric by an order of magnitude.
In service the difference shows up as two distinct failures. A pinned badge loses its clutch and drops off, or the backing metal tears at the pin hole. A sewn badge frays along the stitch line, or the embroidery edge unravels where the thread crosses it.
Neither failure is a defect in the badge alone. A pinned badge that keeps dropping usually has too small a clutch for the emblem weight, while a sewn badge that frays usually has too little border between the stitch and the embroidery. Difei Button supplies both backing types in the same badge so a buyer can test the pair on the actual garment panel. On a pin badge vs sew on badge comparison, that load path difference is the figure that matters most.
| Method | Load path | Typical failure |
|---|---|---|
| Single pin | Two points, 15 mm apart | Clutch released |
| Twin pin | Four points | Pin hole tear out |
| Sewn edge | Full perimeter | Stitch line fray |
| Iron on | Adhesive area | Edge lift after wash |
| Hook and loop | Tape area | Tape stitch failure |
6. Laundry and Cleaning by Badge Attachment Method
Laundering separates the methods faster than wear does. A sewn badge on a poly cotton panel will take a 60 degree Celsius industrial wash, while an iron on badge on the same panel may lift at the edge within five cycles. A pinned badge should come off before the garment is washed, which is both a strength and an administrative burden.
Where a pinned badge is left on by mistake, the risk is not the pin but the clutch. A plated steel clutch in a warm wash will discolour, and the rust mark it leaves on a light panel will not come out. A stainless or nickel plated clutch avoids that outcome at a small unit cost.
Dry cleaning changes the order again, because the solvent attacks some adhesives and softens others. An iron on badge that holds through a home wash may lift in a dry cleaning cycle, so a garment that will be dry cleaned is usually given a stitched or pinned fixing instead. Difei Button can supply the same emblem on a stitched and on a pinned backing so a buyer can compare both routes within one order.
| Method | Home wash 40 C | Industrial 60 C | Dry clean |
|---|---|---|---|
| Sewn | Good | Good | Good |
| Iron on | Fair, 20 to 30 cycles | Poor | Poor |
| Hook and loop | Good | Fair | Good |
| Pin, plated clutch | Remove first | Remove first | Remove first |
| Magnetic | Remove first | Remove first | Good |
7. Choosing by Garment Type and Badge Attachment Method
Garment type settles the method more often than cost does. A blazer, a cap and a staff uniform point to a pin, while a work jacket, a sports shirt and anything washed on an industrial cycle point to a stitch. Cost then adjusts the detail rather than the method. A pin badge vs sew on badge call made at the design stage saves a rework once the garment is in production.
Unit cost is close between the two at volume, because the pin and clutch add a small part cost while the stitch adds a few seconds of labour. The larger cost difference sits in the badge itself, since a sew on badge carries a border and often a felt backing that a pinned badge does not need.
Quantity and reuse push in opposite directions. A badge that is issued to a changing staff and collected back favours a pin, while a badge that is bought once for a garment that will outlast the fashion favours a stitch. A buyer who expects to reorder the same emblem should settle the backing early, since changing it later means new tooling for a moulded back.
| Garment | Method | Reason |
|---|---|---|
| Blazer or suit jacket | Pin, butterfly clutch | Removable, no stitch line |
| Uniform, reusable badge | Pin, locking clutch | Issued and collected |
| Workwear and overalls | Sewn | Industrial laundering |
| Sports shirt | Sewn or iron on | Light panel, low load |
| Cap or beanie | Pin or iron on | Small emblem, curved panel |
| Coated outerwear | Adhesive with stitched frame | Coating resists the needle |
8. Common Faults and Badge Attachment Method Checks
Faults at the badge attachment method stage usually trace back to a mismatch between the emblem weight and the fixing. A badge that turns on the panel means the pin is single and the emblem is heavier than the clutch can hold. A badge that lifts at one corner means the adhesive was applied unevenly.
Incoming inspection catches most of these before the garment is made. Weigh the badge, measure the border between the embroidery and the edge, and check that the clutch holds against a pull of about 10 N to 15 N for a standard pinned part. Difei Button (Guangzhou) Co Ltd checks border width and clutch retention on each badge batch and reports both figures with the shipment.
| Fault | Cause | Check |
|---|---|---|
| Badge rotates on panel | Single pin, heavy emblem | Weight against clutch rating |
| Corner lifts after wash | Uneven adhesive | Edge bond after 3 cycles |
| Stitch line frays | Border under 2 mm | Measure border at four points |
| Clutch lost in wear | Undersized or unworn clutch | Pull test at 10 N |
| Hole tear out | Panel too loose for a pin | Panel weight against pin size |
9. Frequently Asked Questions
9.1 When should I choose a pin badge vs a sew on badge?
Choose a pin badge when the emblem has to be removable, such as on a blazer, a cap or a uniform worn by staff who change, since the badge can be swapped or collected back. Choose a sew on badge when the garment sees hard wear or industrial laundering, because a stitch spreads the load along the whole perimeter and cannot work loose. Where a panel cannot take a needle, an adhesive fixing with a stitched frame sits between the two.
9.2 What should I check in the badge backing options before ordering?
Check the backing profile against the panel, since a flat stamped back sits close on a fine fabric while a raised back clears a thick weave. Confirm the clutch type and its rated weight, because a single butterfly clutch holds up to about 15 g comfortably and a heavier emblem needs a twin post. Ask for the border width between the embroidery and the edge, which should run from 2 mm to 4 mm for a stitched badge. For an adhesive backing, confirm the activation temperature and pressure, since a coated panel needs a lower setting than a plain woven one.
9.3 Does the badge attachment method affect how the garment is washed?
It does, and laundering separates the methods quickly in service. A sewn badge on poly cotton takes a 60 degree Celsius industrial wash, while an adhesive badge on the same panel may lift at the edge within five cycles. A pinned badge is removed before washing, which protects the clutch from discolouring and the panel from a rust mark that will not come out. Dry cleaning attacks some adhesives, so a garment that is dry cleaned is usually given a stitched or pinned fixing instead.
9.4 Can a badge be converted from one fixing to another later?
Conversion is practical in one direction and expensive in the other. A pinned badge can usually be stitched later, because the edge is intact and a stitcher simply needs a border to work along. Moving from a sewn badge to a pin is harder, since the backing of a sew on badge is often a soft felt that will not hold a moulded pin plate. Changing a moulded back also means new tooling, so the backing is worth settling before the first production run.
Recently Posted
-
Batch Consistency at Difei Button: Why Buyers Reorder
October 15, 2026A buyer rarely changes supplier because of price. The usual reason is a second order that does not match the first, and by the tim Read More
 -
Injection Molding Parameters for Plastic Snap Buttons
October 15, 2026An injection molding snap button is not a difficult part to make. It is a small part with a thin spring section, and that spring s Read More
 -
Eyelet Rust and Washer Loss in Wet-Wash Garments
October 15, 2026Two faults arrive together on wet-wash programmes, and they are usually reported as one. Eyelet rusting shows as a brown bloom aro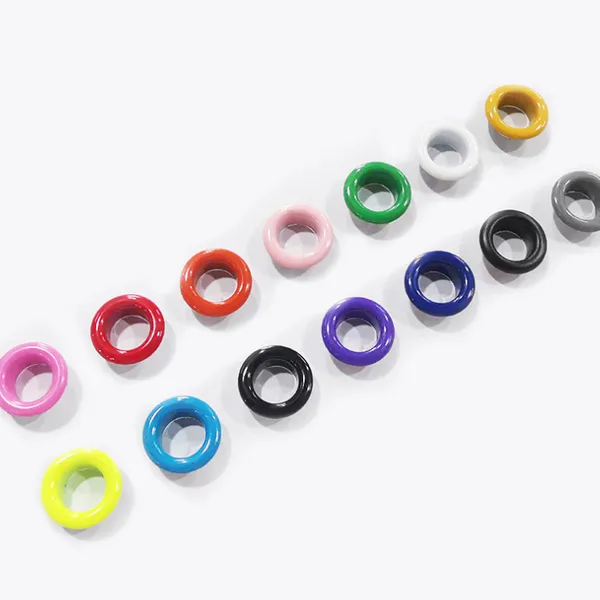 Read More
 -
Badge Plating Wear and Adhesive Failure: Quality Checks
October 15, 2026Two faults decide whether a badge programme survives its first year. Badge plating wear appears at the high points of the relief,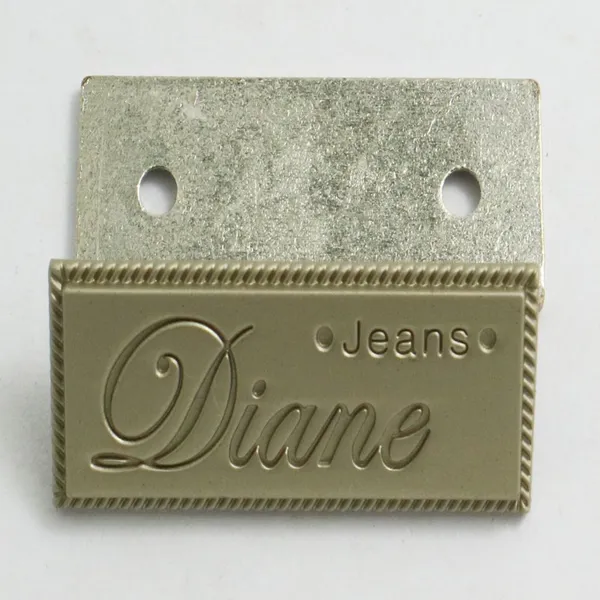 Read More

Contact Us
Recommended Products
-
 Clothing Accessories Lead Free Brass Metal Ring Prong Snap Button With 4 Parts for Infant Baby Clothes Baby BibsUS$ 0.01 - 0.03MOQ: 5000 Sets
 -
Brass Metal Stainless Steel Material Ring Prong Snap Button With 4 Parts Lead Free & Nickel Free for Infant Baby Clothes Baby Bibs Baby SuitsUS$ 0.01 - 0.03MOQ: 5000 Sets
-
Metal Grommets Eyelets Gold Eyelet for Bag Shoes and Garment AccessoriesUS$ 0.01 - 0.03MOQ: 5000 Sets
-
Cheap Price Custom Jeans Button Metal Custom Logo Metal Button for JeansUS$ 0.01 - 0.03MOQ: 5000 Sets
-
Factory Wholesale Hat Bag Clothing Press Snap Button Spring Snap Button Metal Snap ButtonsUS$ 0.03 - 0.06MOQ: 5000 Sets
-
Wholesale Plastic Round Coloured Snaps Button Press Fasteners for Baby Bibs/ Baby GarmentsUS$ 0.01 - 0.03MOQ: 50000 Sets
-
Custom EngravedCopper I Brass Metal Jeans Button Denim Clothes Jacket for Jeans DenimUS$ 0.01 - 0.03MOQ: 5000 Sets
-
17mm Open Hole Shank Button With Aluminum Nail With Logo for Jeans Jacket PantsUS$ 0.01 - 0.03MOQ: 5000 Sets
-
Eco-friendly Custom Size Plastic Snaps Plastic Snap Button for Baby Clothes, Baby BibsUS$ 0.01 - 0.03MOQ: 50000 Sets
-
12mm 15mm 17mm 20mm Four Parts Metal Brass Fastener Press Snap Button for Clothes JacketUS$ 0.03 - 0.06MOQ: 5000 Sets
-
Custom Logo Personalized High Quality Metal Press Snap Fastener Snap Buttons for Clothing Garments JacketUS$ 0.03 - 0.06MOQ: 5000 Sets
-
Custom Printing Round Press Spring Four Part Snap Button for Clothing Leather 405#17mmUS$ 0.03 - 0.06MOQ: 5000 Sets
-
OEM Garment Accessories Custom Baby Snap Button Press Metal Prong Pearl Ring Snap ButtonUS$ 0.01 - 0.03MOQ: 5000 Sets
-
Factory Stock Buttons Stainless Steel or Brass Material Colors Pearl Snap Button Prong Pearl Snap Button for Shirts ClothingUS$ 0.01 - 0.03MOQ: 5000 Sets
-
Apparel Hardware 222# Cap Prong Ring Snap Fastener 10mm for Coat FasteningNegotiableMOQ: 50000 Pieces
-
Open Hole Prong Ring Snap Button 222# 10mm for Leather Sewing ProjectsNegotiableMOQ: 50000 Pieces
-
Zinc Alloy 222# 10mm Open Hole Prong Ring Snap Button Wholesale for Clothing Factory UseNegotiableMOQ: 50000 Pieces
-
222# 10mm Open Hole Prong Ring Snap Fastener for Clothing Sewing and LeatherNegotiableMOQ: 50000 Pieces
-
Antique Bronze 222# 10mm Open Hole Cap Prong Ring Snap Buttons for Denim and Canvas GarmentsNegotiableMOQ: 50000 Pieces
-
New Style 222# 10mm Snap Buttons Cap Type for Bag DecorationNegotiableMOQ: 50000 Pieces