
 Business License
Blog Categories
Rivets for Garments and Bags: Types, Sizes and Placement
A rivet is the smallest piece of hardware on most garments and one of the most heavily loaded. It sits at pocket corners, strap anchors and fly edges, which are the points where fabric is pulled hardest in daily use. The main garment rivet types look similar on a sample board and behave very differently once a load is applied, so the choice deserves a minute of thought rather than a default pick.
This guide separates the common garment rivet types, explains how a tubular rivet vs split rivet decision changes the load path through a panel, and sets out sizing and placement rules for apparel and bag work. It also covers metal selection, setting equipment and the checks that catch a weak setting before goods leave the factory.
1. What Rivets Do on Garments and Bags
A rivet does one of three jobs, and knowing which one applies decides everything else about the specification. It can reinforce a stress point where a seam would pull open, it can anchor a piece of hardware such as a D ring or a buckle, or it can be a decorative element that also holds two layers together. The three uses carry different loads and suit different constructions.
Reinforcement is the oldest use and remains the most common on denim. Pocket corners, belt loops and the fly edge all take repeated tension, and a rivet spreads that tension over a wider area than a bar tack can. Anchoring puts the whole working load of a strap or handle through the fitting, so it needs a larger head and a longer shank than a decorative trim would ever need.
| Job | Typical location | Load carried |
|---|---|---|
| Reinforce a seam | Pocket corner, belt loop, fly edge | Shear and abrasion |
| Anchor hardware | Bag strap, handle, D ring | Tension, often dynamic |
| Decorate a panel | Sleeve, collar, yoke | Minimal, appearance led |
| Close a stack | Leather fold, layered webbing | Compression and peel |
Difei Button sees the anchoring group cause the most complaints, because a strap rivet works loose under a moving load rather than a steady one. A steady pull can be calculated from the load case, while a swinging bag adds a fatigue cycle with every step the wearer takes.
2. Tubular Rivet vs Split Rivet: Two Constructions
The tubular rivet vs split rivet question comes down to how the tail of the shank deforms. A tubular rivet has a hollow barrel that rolls outward into a flange when it is set, gripping the panel evenly around the full circumference. A split rivet has a cut shank that opens into two or more legs and bites into the material at a few points instead.
The tubular form produces a cleaner joint on layered fabric and light leather, and it is the usual choice where the underside of the work is visible. The split form tolerates a thicker stack and a softer material, because the legs can spread without needing a precisely measured shank length, which makes it forgiving on low volume and repair work.
| Property | Tubular rivet | Split rivet |
|---|---|---|
| Tail behaviour | Rolls into an even flange | Opens into two legs |
| Joint strength | Higher on thin stacks | Moderate, better on thick stacks |
| Shank length tolerance | Tight, measured to the stack | Wider |
| Underside appearance | Clean and flat | Visible legs |
| Usual applications | Denim, bags, straps | Craft work, soft leather, repairs |
A practical rule is to specify a tubular rivet whenever the joint carries the weight of the product, and to keep split rivets for decorative work and for repair kits where one length has to cover several stacks. Difei Button (Guangzhou) Co Ltd keeps both constructions in its sample range so that a buyer can compare a set joint on the actual panel before ordering.
3. Rivet Types by Head Shape and Size
The head does more than set the look. A domed head sheds abrasion and resists snagging on a pocket edge, while a flat head sits low and disappears into a panel. A capped head adds a decorative disc over a plain body, which lets a buyer change the appearance of a standard rivet without opening a new tool.
Across the standard garment rivet types, head diameter usually runs from about 6 mm on a light shirt or blouse detail up to roughly 14 mm on a bag anchor. A larger head spreads load over more material and reduces the chance of the rivet tearing through, but it also becomes a snag point on a garment that is worn close to the body.
| Head style | Appearance | Typical use |
|---|---|---|
| Dome | Rounded, stands proud | Denim pockets, bag straps |
| Flat | Low profile, flush look | Workwear, fly edges |
| Capped | Decorative disc over body | Fashion denim, branded trims |
| Countersunk | Sits into a formed seat | Leather goods, metal plates |
4. Rivets for Bags, Straps and Leather Goods
When specifying a rivet for bags, the first figure to fix is the working load rather than the appearance. A shoulder strap that carries 10 kg on one anchor puts a much harder duty on the joint than a decorative stud on a flap, and the fitting has to be sized for the peak load that occurs when the bag is swung or dropped rather than the load at rest.
A rivet for bags that carries a load should be paired with a reinforcement. A doubler behind the panel, a metal plate at the anchor, or a folded webbing loop all spread the load before it reaches the rivet. On leather goods, a washer on the underside is standard because the material is softer than the fitting and will creep under a steady pull.
| Position | Typical size | Reinforcement |
|---|---|---|
| Handle anchor | Head 10 to 12 mm, shank 8 to 10 mm | Doubler plus washer |
| Shoulder strap end | Head 10 to 12 mm, shank 8 to 12 mm | Webbing loop or plate |
| Flap corner | Head 6 to 8 mm, shank 4 to 6 mm | Usually none needed |
| Decorative stud | Head 6 to 10 mm, shank 3 to 5 mm | None |
A bag anchor is also the point where a rivet for bags meets the highest fatigue demand, so the shank should be measured to the assembled stack plus roughly 1 mm of roll allowance rather than ordered by habit.
5. Placement Rules for Garment Rivets
Placement decides whether a correct rivet survives. The general pattern across garment rivet types is that no rivet should sit closer to a seam or a panel edge than roughly twice its own head diameter, because material between the fitting and the edge carries the tear load. A rivet set too close to an edge will pull the edge out before the joint itself fails.
Spacing between fittings matters on a run of studs or a row of pocket rivets. A gap of about 25 mm to 40 mm gives each fitting its own patch of material to work against, while a tighter run concentrates stress between neighbours and starts a tear line along the row.
| Rule | Figure | Reason |
|---|---|---|
| Distance to panel edge | At least twice the head diameter | Prevents edge tear out |
| Distance to a seam | At least 5 mm clear | Avoids cutting the stitch line |
| Spacing in a row | 25 mm to 40 mm | Spreads stress between fittings |
| Corners | Set on the diagonal, not the corner | Removes a start point for a tear |
Difei Button (Guangzhou) supplies a placement drawing with each order so a factory can mark positions from a dimensioned sheet instead of measuring from a photograph of an approved sample.
6. Rivet Types in Brass, Steel and Zinc Alloy
Material sets the strength ceiling and the finish options at the same time. Brass machines well and takes a bright plate, which is why it remains common on fashion denim and on fittings where a warm tone is wanted. Steel brings higher strength per gram, and stainless grades remove the corrosion question altogether at a higher unit cost.
Zinc alloy die casting suits complex or decorative shapes at a low tooling cost, and it holds plating well when the base is prepared properly. The trade off is lower strength than steel, which means a zinc alloy fitting belongs on a decorative position rather than on a strap anchor that sees a dynamic load.
| Material | Strength | Well matched to |
|---|---|---|
| Brass | High | Plated fashion trims, snap bodies |
| Carbon steel | Very high | Workwear, heavy bag anchors |
| Stainless steel | High, corrosion free | Marine, outdoor, swimwear |
| Zinc alloy | Moderate | Decorative shapes, badges |
| Aluminium | Low to moderate | Lightweight trims, colour anodising |
For a rivet for bags that will be used near salt water, stainless steel or a heavy nickel free plate is the safer specification, since a thin decorative coating on a steel body will break down at the edges first. Difei Button plates to a minimum thickness rather than to a target appearance for that reason.
7. Setting Equipment for Tubular and Split Rivet Work
The tubular rivet vs split rivet choice also sets the tooling. A tubular rivet is set with a roll die that curls the barrel outward, and the die must be matched to the barrel diameter and to the shank length so the flange forms in one stroke rather than two. Split rivets are set with a simple punch and an anvil, and a hand tool is often enough for small volumes.
For production, a foot press or a pneumatic press with a depth stop gives a repeatable result and is the difference between a joint that tastes firm and one that wobbles. The press should be set against a measured sample and the depth stop recorded, because the same nominal rivet will need a different stroke on a 2 mm stack and a 4 mm stack.
| Method | Volume | Notes |
|---|---|---|
| Hand setting tool | Sample and repair | Operator dependent |
| Foot press | Small to medium runs | Depth stop essential |
| Pneumatic press | Production lines | Repeatable stroke, faster cycle |
| Automatic feed press | High volume trims | Requires a fixed stack height |
8. Rivet Sizes and Types: A Selection Chart
A selection chart turns the theory into a starting point. Measure the assembled thickness of the material stack first, then pick the shank length that leaves roughly 1 mm to 1.5 mm of material to roll or spread. Head diameter follows the load, and head style follows the appearance requirement.
Where a stack varies across a run, for example on a hand finished leather line, a split rivet with a wider tolerance band avoids the constant die changes that a tubular rivet would demand. Where the stack is controlled by a die cut pattern, the tubular form gives the better joint.
| Stack thickness | Shank length | Head diameter |
|---|---|---|
| 1.5 to 2 mm | 3 to 4 mm | 6 to 8 mm |
| 2 to 3 mm | 4 to 5 mm | 8 to 10 mm |
| 3 to 5 mm | 5 to 8 mm | 10 to 12 mm |
| 5 to 8 mm | 8 to 11 mm | 12 to 14 mm |
Difei Button keeps a sample set of the garment rivet types it runs most often, so a buyer can compare a physical fitting against a panel before committing to a specification.
9. Frequently Asked Questions
9.1 What are the main garment rivet types?
Four constructions cover most work. The tubular rivet rolls a hollow barrel into a flange and gives the strongest joint on thin stacks, while the split rivet opens two legs and tolerates variation in thickness. The screw together post rivet can be removed and reused, which suits leather goods that may need repair, and the capped rivet is a tubular body with a decorative disc pressed over the head. Most buyers settle on the first two, and use the other two just where removal or appearance demands it.
9.2 How do I choose a rivet for bags?
Start from the peak load rather than the average. A rivet for bags that anchors a shoulder strap should be sized for the moment the bag is swung, which can be several times the static weight. Measure the assembled stack, add roughly 1 mm for the roll, and pick the head diameter that spreads the load over enough material. Then add reinforcement behind the panel, because the fabric or leather usually fails before a correctly set fitting does, and a washer on the inside face is the least expensive insurance.
9.3 Which is stronger, a tubular rivet vs split rivet?
In a tubular rivet vs split rivet comparison on the same stack, the tubular form usually wins on shear strength because the rolled flange grips the full circumference rather than two spots. The advantage narrows as the stack gets thicker and softer, where the legs of a split rivet can follow the material instead of crushing it. On leather above roughly 4 mm, the practical difference often disappears, and the deciding factor becomes how well the shank length matches the stack.
9.4 What size rivet suits a 3 mm denim stack?
A 3 mm denim stack usually takes a shank of about 4 mm to 5 mm with a head of roughly 8 mm to 10 mm. The shank figure allows for the material that rolls into the flange, so the finished joint grips the stack without crushing it. Check the roll on a first article rather than trusting the nominal length, because denim compresses under pressure and a shank that measures correctly on paper can come out short on a tight weave. Ordering one size up and confirming it on a test set is usually cheaper than a second production run.
Recently Posted
-
Batch Consistency at Difei Button: Why Buyers Reorder
October 15, 2026A buyer rarely changes supplier because of price. The usual reason is a second order that does not match the first, and by the tim Read More
 -
Injection Molding Parameters for Plastic Snap Buttons
October 15, 2026An injection molding snap button is not a difficult part to make. It is a small part with a thin spring section, and that spring s Read More
 -
Eyelet Rust and Washer Loss in Wet-Wash Garments
October 15, 2026Two faults arrive together on wet-wash programmes, and they are usually reported as one. Eyelet rusting shows as a brown bloom aro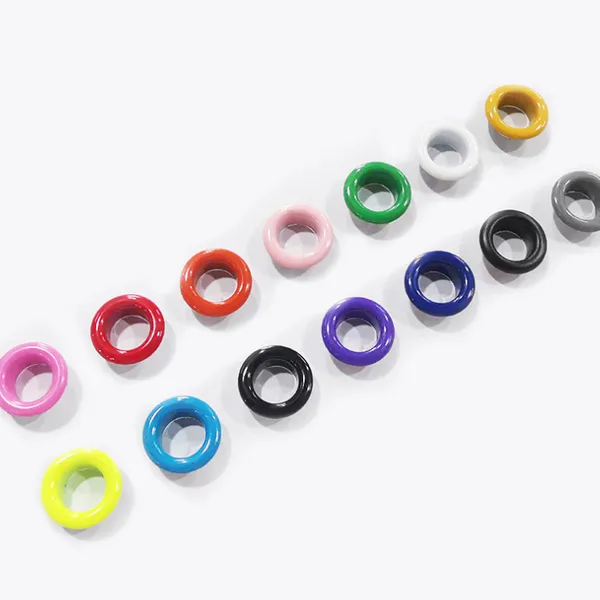 Read More
 -
Badge Plating Wear and Adhesive Failure: Quality Checks
October 15, 2026Two faults decide whether a badge programme survives its first year. Badge plating wear appears at the high points of the relief,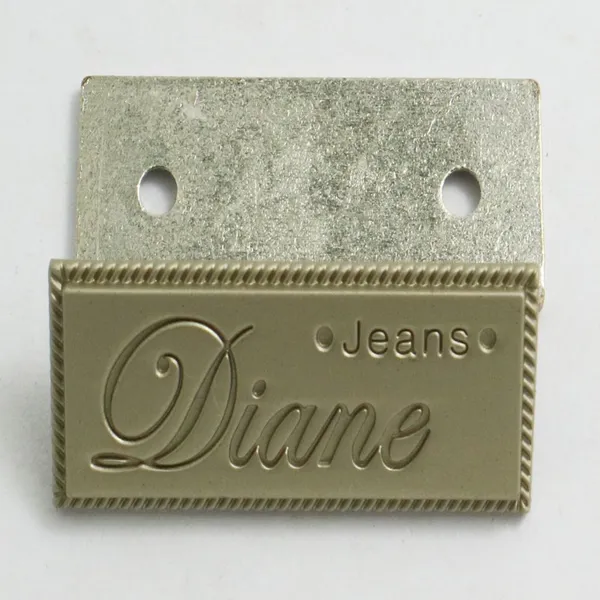 Read More

Contact Us
Recommended Products
-
 Clothing Accessories Lead Free Brass Metal Ring Prong Snap Button With 4 Parts for Infant Baby Clothes Baby BibsUS$ 0.01 - 0.03MOQ: 5000 Sets
 -
Brass Metal Stainless Steel Material Ring Prong Snap Button With 4 Parts Lead Free & Nickel Free for Infant Baby Clothes Baby Bibs Baby SuitsUS$ 0.01 - 0.03MOQ: 5000 Sets
-
Metal Grommets Eyelets Gold Eyelet for Bag Shoes and Garment AccessoriesUS$ 0.01 - 0.03MOQ: 5000 Sets
-
Cheap Price Custom Jeans Button Metal Custom Logo Metal Button for JeansUS$ 0.01 - 0.03MOQ: 5000 Sets
-
Factory Wholesale Hat Bag Clothing Press Snap Button Spring Snap Button Metal Snap ButtonsUS$ 0.03 - 0.06MOQ: 5000 Sets
-
Wholesale Plastic Round Coloured Snaps Button Press Fasteners for Baby Bibs/ Baby GarmentsUS$ 0.01 - 0.03MOQ: 50000 Sets
-
Custom EngravedCopper I Brass Metal Jeans Button Denim Clothes Jacket for Jeans DenimUS$ 0.01 - 0.03MOQ: 5000 Sets
-
17mm Open Hole Shank Button With Aluminum Nail With Logo for Jeans Jacket PantsUS$ 0.01 - 0.03MOQ: 5000 Sets
-
Eco-friendly Custom Size Plastic Snaps Plastic Snap Button for Baby Clothes, Baby BibsUS$ 0.01 - 0.03MOQ: 50000 Sets
-
12mm 15mm 17mm 20mm Four Parts Metal Brass Fastener Press Snap Button for Clothes JacketUS$ 0.03 - 0.06MOQ: 5000 Sets
-
Custom Logo Personalized High Quality Metal Press Snap Fastener Snap Buttons for Clothing Garments JacketUS$ 0.03 - 0.06MOQ: 5000 Sets
-
Custom Printing Round Press Spring Four Part Snap Button for Clothing Leather 405#17mmUS$ 0.03 - 0.06MOQ: 5000 Sets
-
OEM Garment Accessories Custom Baby Snap Button Press Metal Prong Pearl Ring Snap ButtonUS$ 0.01 - 0.03MOQ: 5000 Sets
-
Factory Stock Buttons Stainless Steel or Brass Material Colors Pearl Snap Button Prong Pearl Snap Button for Shirts ClothingUS$ 0.01 - 0.03MOQ: 5000 Sets
-
Apparel Hardware 222# Cap Prong Ring Snap Fastener 10mm for Coat FasteningNegotiableMOQ: 50000 Pieces
-
Open Hole Prong Ring Snap Button 222# 10mm for Leather Sewing ProjectsNegotiableMOQ: 50000 Pieces
-
Zinc Alloy 222# 10mm Open Hole Prong Ring Snap Button Wholesale for Clothing Factory UseNegotiableMOQ: 50000 Pieces
-
222# 10mm Open Hole Prong Ring Snap Fastener for Clothing Sewing and LeatherNegotiableMOQ: 50000 Pieces
-
Antique Bronze 222# 10mm Open Hole Cap Prong Ring Snap Buttons for Denim and Canvas GarmentsNegotiableMOQ: 50000 Pieces
-
New Style 222# 10mm Snap Buttons Cap Type for Bag DecorationNegotiableMOQ: 50000 Pieces