
 Business License
Blog Categories
Rivet Length Selection: Matching Rivet to Material Thickness
Rivet length selection looks like a single number on an order, but it is really the outcome of a measurement and a short piece of arithmetic. Get the measurement wrong and the same rivet will either sit loose in its hole or crack at the shank during setting, and both faults reach the customer rather than staying in the workshop.
This guide sets out how a material stack is measured, what a rivet grip range actually covers, how to choose a rivet for thick fabric without over setting it, and which fields belong on a specification so the choice is not left to whoever runs the press on the day.
1. Rivet Length Selection Starts With the Material Stack
Rivet length selection begins at the panel rather than at the hardware catalogue, because the rivet has to span whatever sits between its head and its burr. That span is the material stack, and it is made up of the layers the rivet passes through plus any interlining, reinforcement patch or seam that falls inside the fixing point.
The stack has to be measured under compression rather than loose, because most garment materials thin out under the setting force. A denim panel that measures 1.1 mm loose may compress to 0.95 mm under the die, and a leather panel can compress by 0.2 mm or more depending on its temper.
| Layer | Loose thickness | Compressed thickness |
|---|---|---|
| Denim, single layer | 1.1 mm | 0.95 mm |
| Denim at a seam | 2.4 mm | 2.1 mm |
| Leather, 1.2 mm temper | 1.2 mm | 1.0 mm |
| Canvas, bonded | 1.6 mm | 1.4 mm |
A caliper reading taken on a flat swatch is therefore the starting figure rather than the answer, and the seam positions should be measured on the finished panel where they fall in the fixing path.
2. Rivet Grip Range: What the Figure Means
A rivet grip range is the band of stack thickness that one rivet length will hold properly, and it is quoted as a minimum and a maximum rather than as a single figure. A rivet listed with a grip range of 3.0 mm to 5.0 mm will set correctly on any stack inside that band, and it will fail outside it in one of two opposite ways.
| Stack thickness | Result with a 3.0 to 5.0 mm rivet | Fault seen |
|---|---|---|
| 2.0 mm, too thin | Post too long, burr cannot seat | Rivet loose from new |
| 3.0 to 5.0 mm, in range | Burr rolls onto the shank | None |
| 5.5 mm, too thick | Post too short, shank cracks | Split shank or fallen stud |
| 6.0 mm, well over | Post will not pass through | Setting refused or forced |
The arithmetic behind the figure is simple: the post length equals the compressed stack plus the burr thickness plus a protrusion of 0.5 mm to 1.0 mm that the die rolls over. A rivet for thick fabric therefore is not simply a longer rivet, because the burr thickness and the die depth also move with the stack.
3. Rivet for Thick Fabric: Measuring the Stack
A rivet for thick fabric needs a measurement taken at the point of fixing rather than at the edge of the panel. Thick materials rarely present a flat surface, and a rivet placed over a folded seam crosses a step that is twice the single layer thickness.
The practical method is to cut a small section of the panel at the fixing point, compress it under a known load that matches the press setting, and measure the result with a caliper. Where a section cannot be cut, the same figure can be reached by measuring the panel open and closed at the seam with a spring caliper.
| Fixing point | Measured span | Rivet length called out |
|---|---|---|
| Denim, flat panel | 0.95 mm | 6 mm post |
| Denim over a seam | 2.1 mm | 8 mm post |
| Leather plus lining | 1.9 mm | 8 mm post |
| Leather plus patch plus lining | 2.6 mm | 9 mm post |
A buyer should record the measured span on the order rather than the rivet size alone, since the same nominal rivet can be listed under different post lengths by different suppliers. The measurement also settles a dispute later without needing to ship a sample back.
Difei Button asks for the measured stack on every rivet order and returns a grip range against it, so the panel is matched to the hardware before the first die is cut.
4. Rivet Length Selection for Leather, Denim and Canvas
Rivet length selection differs by material because each one compresses and recovers differently. Leather compresses under the die and then springs back, which pulls the burr back against the shank and can leave the rivet feeling slack. Denim compresses less and holds the set well. Canvas with a bonded interlining behaves like a stiff laminate and resists compression almost completely.
| Material | Compression under die | Recovery | Allowance |
|---|---|---|---|
| Leather, soft temper | 0.2 mm | High | Add 0.5 mm to post |
| Leather, firm temper | 0.1 mm | Moderate | Add 0.3 mm to post |
| Denim | 0.15 mm | Low | Standard allowance |
| Canvas, bonded | 0.05 mm | Very low | No extra allowance |
Leather is the case that most often returns a complaint, because a rivet that measures correctly on the bench can loosen after a week of wear as the material recovers. Adding half a millimetre to the post length, or using a toothed washer that grips the underside, removes most of that movement.
5. Rivet Length Selection: Barrel, Washer and Finished Height
The visible result depends on three figures rather than on post length alone: the barrel length, the washer thickness and the finished height of the assembly. A plain washer of 0.5 mm and a toothed washer of 0.8 mm take up different amounts of the post, so the same rivet produces a different finished height with each.
| Component | Typical figure | Effect on selection |
|---|---|---|
| Post length | 6 to 10 mm | Sets the grip range |
| Plain washer | 0.5 mm | Adds to the span |
| Toothed washer | 0.8 mm | Adds more, grips better |
| Finished height | Head plus 1.5 mm | Sets the clearance inside |
Finished height matters where the rivet sits against a lining or a body panel, because a burr that stands 2 mm proud inside a jacket presses into the wearer. Where the inside has to stay flat, a longer post with a thin washer is the better combination than a short post with a thick one.
6. Rivet Grip Range and Setting Tool Tolerance
The press and the die add their own tolerance to the rivet grip range, and the two should be quoted together. A hand press with a fixed stroke holds depth to around plus or minus 0.2 mm, while a well set machine press holds to plus or minus 0.1 mm. That variation narrows the usable part of the grip range at both ends.
A die that is worn adds a further variable, because the forming pocket deepens as it wears and rolls the burr further than the original setting. Die life is usually quoted in tens of thousands of settings, and a die at the end of its life can sit 0.15 mm deeper than a new one.
Where the stack sits near the edge of a grip range, the practical answer is to move to the next rivet length rather than to tighten the press. Setting the die deeper to reach a stack that is too thick cracks the shank, and the crack often appears on the second or third setting rather than the first. Difei Button prints the press setting alongside the rivet length on the packing note for that reason.
7. Rivet for Thick Fabric: Common Failures and Their Causes
Four failures account for almost every rivet complaint, and each one points back to length rather than to material. A loose rivet comes from a post that is too long for the stack, a cracked shank from a post that is too short, and a split panel from a hole that is too small for the shank. A burr that will not roll comes from a die that is worn or a stack that is outside the range.
| Fault | Cause | Correction |
|---|---|---|
| Rivet loose from new | Post 1.5 mm too long | Step down one length |
| Cracked shank | Post too short for stack | Step up one length |
| Panel splits at hole | Hole 0.2 mm undersize | Open the hole, add a washer |
| Burr stands proud | Die worn or stack too thick | Replace die, re-check stack |
Diagnosis is faster when the failed sample is kept with its measurement rather than described in words, because a photograph cannot show whether the post stood 1 mm proud or 2 mm. A buyer who keeps three settings from the first article, one at each end of the tolerance, can settle the question in a single email.
8. Rivet Length Selection on a Specification Sheet
A specification sheet should carry six fields for a rivet rather than a single size. They are the measured stack, the grip range required, the post length, the washer type and thickness, the hole diameter, and the acceptable finished height. With those six written down, a supplier can quote a part that works rather than a part that is close.
| Field | Example value | Why it matters |
|---|---|---|
| Measured stack | 2.1 mm at seam | Fixes the starting point |
| Grip range required | 1.9 to 2.4 mm | Allows for variation |
| Post length | 8 mm | Selected from the range |
| Washer | Toothed, 0.8 mm | Adds to the span |
| Hole diameter | 2.4 mm | Prevents a split panel |
| Finished height | Under 2.5 mm inside | Protects the lining |
Two of those fields are commonly left off and both cause trouble. The hole diameter is often assumed from the shank, while fabric needs 0.2 mm to 0.4 mm of clearance to avoid a split. The finished height is often left open, while it decides whether the wearer feels the burr.
Difei Button (Guangzhou) Co Ltd issues a rivet specification sheet in that form, and Difei returns a recommended length and washer against a measured stack so a buyer can see the reasoning rather than a number alone.
9. Frequently Asked Questions
9.1 How do I measure a stack for rivet length selection?
Measure the layers under compression rather than loose, because most garment materials thin out under the setting force. The practical method is to cut a small section at the fixing point, compress it under a load that matches the press, and read the result with a caliper. Where a section cannot be cut, measure the panel open and closed at the seam with a spring caliper. A denim seam that reads 2.4 mm loose will usually compress to around 2.1 mm, and a soft leather panel can lose 0.2 mm or more under the same load.
9.2 What does rivet grip range mean on a data sheet?
It is the band of stack thickness that one rivet length will set correctly, quoted as a minimum and a maximum rather than as a single figure. A rivet listed at 3.0 mm to 5.0 mm holds on any stack inside that band and fails outside it in opposite ways, going loose when the stack is too thin and cracking when it is too thick. The band narrows once the press tolerance and the die wear are added, so the usable part of it is smaller than the printed figure.
9.3 Which rivet for thick fabric should I specify?
Specify a rivet whose grip range covers the measured stack with about half a millimetre of margin at each end, rather than choosing the longest rivet available. A rivet for thick fabric fails by cracking the shank when the post is short, which is the opposite of the loose rivet that comes from a post that is too long. Where a seam doubles the thickness, measure at the seam rather than on the flat panel. Adding a toothed washer also helps on thick and springy material.
9.4 Why does a rivet feel loose after a week of wear?
A rivet that measures correctly on the bench can loosen as the material recovers, and leather is the usual case because it compresses under the die and springs back afterwards. The recovery pulls the burr back against the shank and leaves the assembly feeling slack. Adding half a millimetre to the post length absorbs most of that movement, and a toothed washer that grips the underside removes the rest. Re-checking the stack after a week of wear confirms whether recovery is the cause.
Recently Posted
-
Batch Consistency at Difei Button: Why Buyers Reorder
October 15, 2026A buyer rarely changes supplier because of price. The usual reason is a second order that does not match the first, and by the tim Read More
 -
Injection Molding Parameters for Plastic Snap Buttons
October 15, 2026An injection molding snap button is not a difficult part to make. It is a small part with a thin spring section, and that spring s Read More
 -
Eyelet Rust and Washer Loss in Wet-Wash Garments
October 15, 2026Two faults arrive together on wet-wash programmes, and they are usually reported as one. Eyelet rusting shows as a brown bloom aro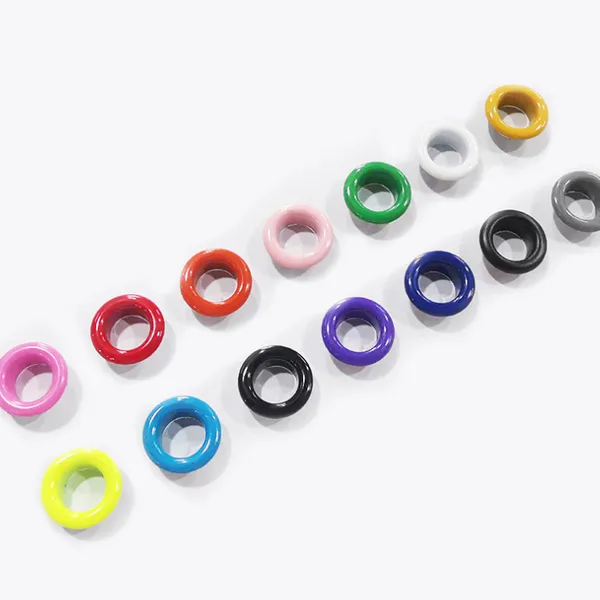 Read More
 -
Badge Plating Wear and Adhesive Failure: Quality Checks
October 15, 2026Two faults decide whether a badge programme survives its first year. Badge plating wear appears at the high points of the relief,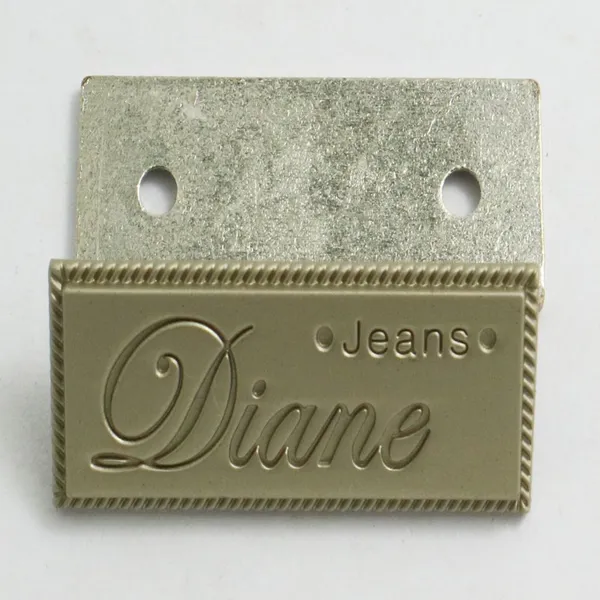 Read More

Contact Us
Recommended Products
-
 Clothing Accessories Lead Free Brass Metal Ring Prong Snap Button With 4 Parts for Infant Baby Clothes Baby BibsUS$ 0.01 - 0.03MOQ: 5000 Sets
 -
Brass Metal Stainless Steel Material Ring Prong Snap Button With 4 Parts Lead Free & Nickel Free for Infant Baby Clothes Baby Bibs Baby SuitsUS$ 0.01 - 0.03MOQ: 5000 Sets
-
Metal Grommets Eyelets Gold Eyelet for Bag Shoes and Garment AccessoriesUS$ 0.01 - 0.03MOQ: 5000 Sets
-
Cheap Price Custom Jeans Button Metal Custom Logo Metal Button for JeansUS$ 0.01 - 0.03MOQ: 5000 Sets
-
Factory Wholesale Hat Bag Clothing Press Snap Button Spring Snap Button Metal Snap ButtonsUS$ 0.03 - 0.06MOQ: 5000 Sets
-
Wholesale Plastic Round Coloured Snaps Button Press Fasteners for Baby Bibs/ Baby GarmentsUS$ 0.01 - 0.03MOQ: 50000 Sets
-
Custom EngravedCopper I Brass Metal Jeans Button Denim Clothes Jacket for Jeans DenimUS$ 0.01 - 0.03MOQ: 5000 Sets
-
17mm Open Hole Shank Button With Aluminum Nail With Logo for Jeans Jacket PantsUS$ 0.01 - 0.03MOQ: 5000 Sets
-
Eco-friendly Custom Size Plastic Snaps Plastic Snap Button for Baby Clothes, Baby BibsUS$ 0.01 - 0.03MOQ: 50000 Sets
-
12mm 15mm 17mm 20mm Four Parts Metal Brass Fastener Press Snap Button for Clothes JacketUS$ 0.03 - 0.06MOQ: 5000 Sets
-
Custom Logo Personalized High Quality Metal Press Snap Fastener Snap Buttons for Clothing Garments JacketUS$ 0.03 - 0.06MOQ: 5000 Sets
-
Custom Printing Round Press Spring Four Part Snap Button for Clothing Leather 405#17mmUS$ 0.03 - 0.06MOQ: 5000 Sets
-
OEM Garment Accessories Custom Baby Snap Button Press Metal Prong Pearl Ring Snap ButtonUS$ 0.01 - 0.03MOQ: 5000 Sets
-
Factory Stock Buttons Stainless Steel or Brass Material Colors Pearl Snap Button Prong Pearl Snap Button for Shirts ClothingUS$ 0.01 - 0.03MOQ: 5000 Sets
-
Apparel Hardware 222# Cap Prong Ring Snap Fastener 10mm for Coat FasteningNegotiableMOQ: 50000 Pieces
-
Open Hole Prong Ring Snap Button 222# 10mm for Leather Sewing ProjectsNegotiableMOQ: 50000 Pieces
-
Zinc Alloy 222# 10mm Open Hole Prong Ring Snap Button Wholesale for Clothing Factory UseNegotiableMOQ: 50000 Pieces
-
222# 10mm Open Hole Prong Ring Snap Fastener for Clothing Sewing and LeatherNegotiableMOQ: 50000 Pieces
-
Antique Bronze 222# 10mm Open Hole Cap Prong Ring Snap Buttons for Denim and Canvas GarmentsNegotiableMOQ: 50000 Pieces
-
New Style 222# 10mm Snap Buttons Cap Type for Bag DecorationNegotiableMOQ: 50000 Pieces